Geek-Notes-Webpage

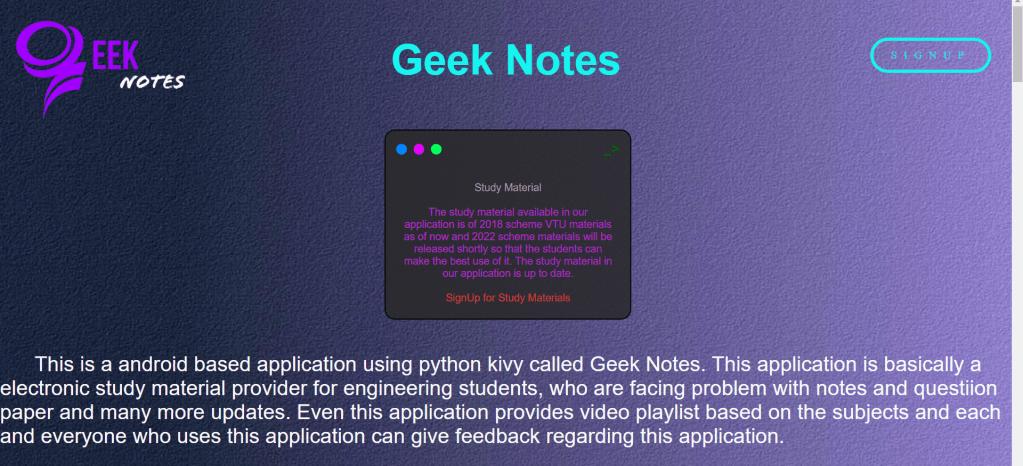
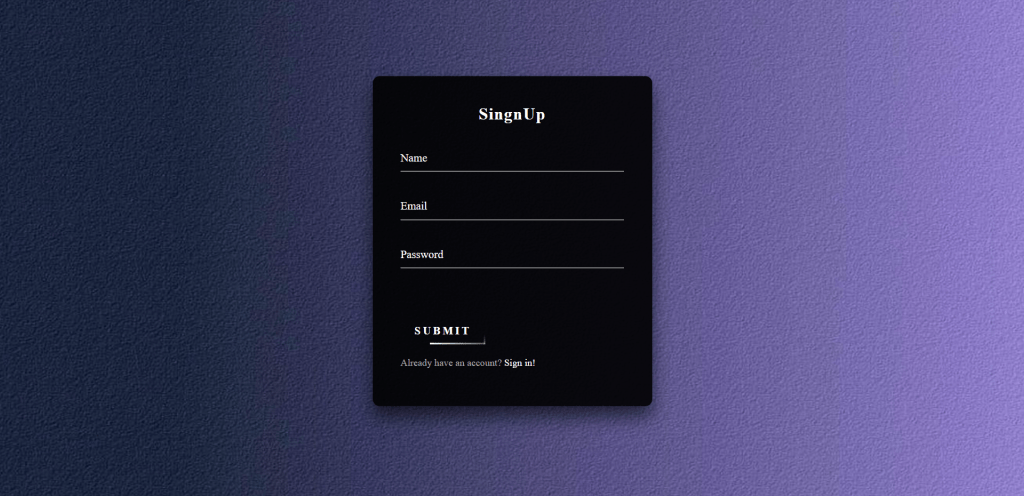
A animated frontend web development using HTML and CSS. This webpage is a simple frontend page of Geek Notes, here i have added a animated buttons for this cool webpage.

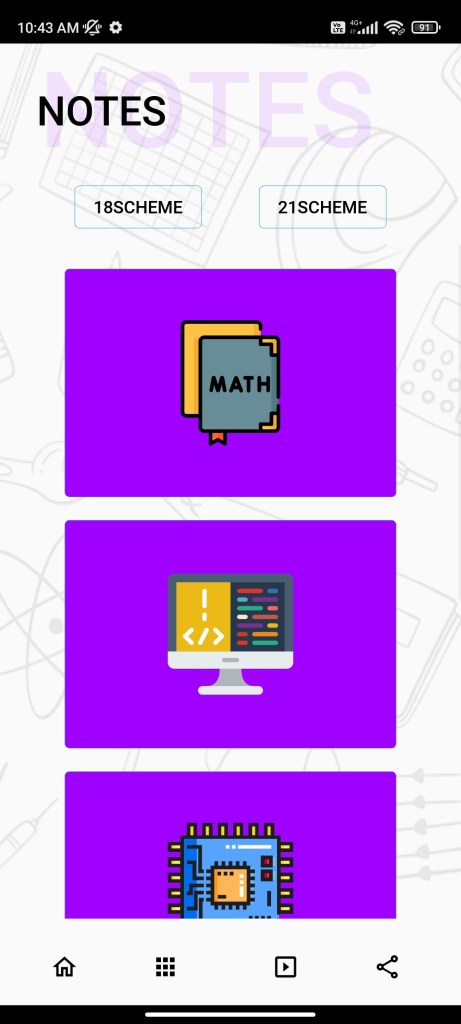
This webpage consits the details of geek notes application if you guys try to run this web page you can download the geek notes application for free. In this i have added a signup and login form. The backend development is not at complete right now, hope i will complete it soon as possible.

Web browsers receive HTML documents from a web server or from local storage and render the documents into multimedia web pages. HTML describes the structure of a web page semantically and originally included cues for its appearance.

HTML elements are the building blocks of HTML pages. With HTML constructs, images and other objects such as interactive forms may be embedded into the rendered page. HTML provides a means to create structured documents by denoting structural semantics for text such as headings, paragraphs, lists, links, quotes, and other items. HTML elements are delineated by tags, written using angle brackets. Tags such as  and directly introduce content into the page. Browsers do not display the HTML tags but use them to interpret the content of the page.

Cascading Style Sheets (CSS) is a style sheet language used for describing the presentation of a document written in a markup language such as HTML or XML (including XML dialects such as SVG, MathML or XHTML).CSS is a cornerstone technology of the World Wide Web, alongside HTML and JavaScript.

CSS is designed to enable the separation of content and presentation, including layout, colors, and fonts.This separation can improve content accessibility; provide more flexibility and control in the specification of presentation characteristics; enable multiple web pages to share formatting by specifying the relevant CSS in a separate .css file, which reduces complexity and repetition in the structural content; and enable the .css file to be cached to improve the page load speed between the pages that share the file and its formatting.

Here you can find the snapshoots of geek notes web page:

Google-Homepage-Clone

Clone of google homepage using HTML. In this i have cloned google home page where you can insert the input but the search engine will not be working because this is just a clone of google home page.

Web browsers receive HTML documents from a web server or from local storage and render the documents into multimedia web pages. HTML describes the structure of a web page semantically and originally included cues for its appearance.

HTML elements are the building blocks of HTML pages. With HTML constructs, images and other objects such as interactive forms may be embedded into the rendered page. HTML provides a means to create structured documents by denoting structural semantics for text such as headings, paragraphs, lists, links, quotes, and other items.

HTML can embed programs written in a scripting language such as JavaScript, which affects the behavior and content of web pages. The inclusion of CSS defines the look and layout of content. The World Wide Web Consortium (W3C), former maintainer of the HTML and current maintainer of the CSS standards, has encouraged the use of CSS over explicit presentational HTML since 1997.

For cutomizing this web page you can use atom IDE or notepad.

Geek Notes

Android application using python Kivy by Tech Geeks.

This a android app built using python kivy called Geek Notes. This app is basically a notes app for engineering students, who are facing problem with notes and questiion paper. Even this app provides video playlist based on the subjects and even you guys can give feedback about the app.

This app mainly consists of 4 screens:

  1. Home Screen
  2. Notes Screen
  3. Video Screen
  4. Share Screen

Home Screen:

This screen consists of 3 categories Exam time tables, Question papers, Labratory manuals. Laboratory manuals will be uploaded in further updates. The snapshot of Home Screen is shown below:

Notes Screen:

This screen consists of 2 categories 2018 Scheme, 2021 Scheme. In this screen you guys will find notes of main branches such as Computer Science, Mechanical, Civil, Electronics & Communication. The snapshot of Notes Screen is shown below:

Video Screen:

This screen consists of videos of each and every subject, if you click on a particular subject button it will redirect you to best YouTube playlist. The snapshot of Video Screen is shown below:

Share Screen:

This screen consists of 3 categories namely Feedback, Report a bug, Rate us. These 3 will guide you to the new page where you can give feedback about the app, report a bug in the app and you can rate our app. The snapshot of Share Screen is shown below:

Tested On:

Android such as Realme, Samsung, OnePlus, Redmi, Nothing etc.

Note this application works only on Android operating system.

” You guys can download our app from my GitHub”

DigiSpark ATTINY85

Digispark is an ATtiny85 based microcontroller development board come with USB interface. Here we have introduced to open chrome and browse multiple results and download a specific image/picture. And save in your computer. This code is usefull only when you have a programmable DIGISPARK ATTINY85 board.

“Refer the below link TO SETUP A DIGISPARK BOARD :” https://startingelectronics.org/tutorials/arduino/digispark/digispark-windows-setup/

“You can also refer this YOUTUBE VIDEO :” https://youtu.be/wlIHg8nh0iY In this video they have explained each and every thing step by step. Digispark looks as shown below :

The below code is for opening chrome and downloading a particular image.

#include “DigiKeyboard.h”

void setup() {
  // don’t need to set anything up to use DigiKeyboard
}

void loop() {
  // this is generally not necessary but with some older systems it seems to
  // prevent missing the first character after a delay:
  DigiKeyboard.sendKeyStroke(0);
  DigiKeyboard.sendKeyStroke(KEY_R, MOD_GUI_LEFT);
  DigiKeyboard.delay(500);
  // Type out this string letter by letter on the computer (assumes US-style
  // keyboard)
  DigiKeyboard.print(“chrome”);
  DigiKeyboard.delay(500);
  DigiKeyboard.sendKeyStroke(KEY_ENTER);
  DigiKeyboard.sendKeyStroke(KEY_ENTER);
  // It’s better to use DigiKeyboard.delay() over the regular Arduino delay()
  // if doing keyboard stuff because it keeps talking to the computer to make
  // sure the computer knows the keyboard is alive and connected
  DigiKeyboard.delay(5000);
  DigiKeyboard.println(“neymar”);
  DigiKeyboard.delay(1000);
  DigiKeyboard.sendKeyStroke(KEY_ENTER);
  DigiKeyboard.delay(5000);
  DigiKeyboard.sendKeyStroke(KEY_K, MOD_CONTROL_LEFT);
  DigiKeyboard.print(“MESSI”);
  DigiKeyboard.delay(1000);
  DigiKeyboard.sendKeyStroke(KEY_ENTER);
  DigiKeyboard.delay(5000);
  DigiKeyboard.sendKeyStroke(KEY_T, MOD_CONTROL_LEFT);
  DigiKeyboard.print(“https://phantom-marca.unidadeditorial.es/775876235334c9f43394d226ac349c1d/resize/1320/f/jpg/assets/multimedia/imagenes/2022/01/14/16421717588322.jpg”);
  DigiKeyboard.sendKeyStroke(KEY_ENTER);
  DigiKeyboard.delay(5000);
  DigiKeyboard.sendKeyStroke(KEY_S, MOD_CONTROL_LEFT);
  DigiKeyboard.delay(5000);
  DigiKeyboard.sendKeyStroke(KEY_ENTER);
  for (;;) {

}
}

Tested On :
Windows 10

You can also refer my GitHub for more specific information.

Object Detector

This is a Object Detector using ultrasonic sensor.

Components used :

  • Arduino Uno
  • Ultrasonic Sensor
  • Breadboard
  • Servo Motor
  • Jumper Wires

With the use of ultrasonic sensors, objects can be detected and the distance can be measured from the sensors and it can also be displayed using the lcd screen.

Here two softwares are used, Arduino software and Processing 4 software

For more information or code contact through my e-mail.

Termux

This site is mainly based on TERMUX hacking . Hope you find this site will be very use full.

THIS IS ONLY FOR EDUCATIONAL PURPOSE

NOTE : We are not responsible for any misuse for the given code.

Now let’s start from basic.

U can install TERMUX using Play store or Github

After installing from Play Store or Github open your TERMUX application and wait for sometime to initialize.

After Initialization your TERMUX look as below.

After this you should install some basic packages. The code is given below.

$ pkg install git

$ pkg install python

Now I will let you know how to update packages.

$ apt update

$ apt upgrade

1: TBOMB

This tool is basically used to send anonymous SMS to victim’s number.

The code for installation and use you can find below:

$ apt update

$ apt upgrade

$ pkg install git

$ pkg install python

$ git clone https://github.com/TheSpeedX/TBomb.git

$ cd TBomb

$ ./TBomb.sh

2: HIDDEN EYE

This tool is used for Phishing.

The code for installation and use you can find below:

$ apt update

$ apt upgrade

$ pkg install python

$ git clone https://github.com/DarkSecDevelopers/HiddenEye-Legacy.git

$ cd HiddenEye-Legacy

$ chmod 777 *

$ pip install -r requirements.txt

$ python HiddenEye.py

3: Nexphisher

Even this tool is used for Phishing.

$ apt update

$ apt install git -y

$ git clone git://github.com/htr-tech/nexphisher.git

$ cd nexphisher

$ bash setup

$ bash tmux_setup

$ bash nexphisher